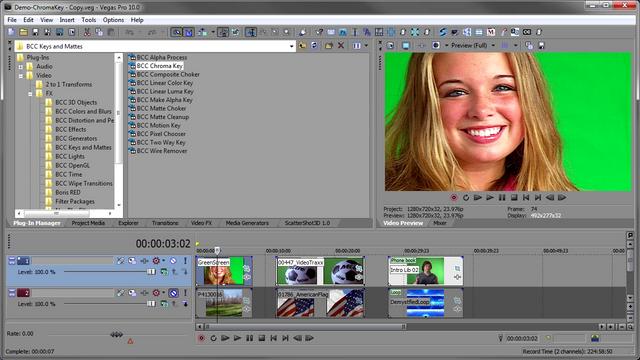
My Group and I have created a mini film using transitions and effects in order to make our story line more effective, as well as doing this we used a variety of new things that we have never used before such as the green screen when doing the news report. As well as this we have also used other editing techniques in order to make the clips look interesting.
The reason why we have used editing techniques like this is so that it can bring tension to the audience, as well as this it would also allow the viewers to pay more attention to the film and think about where will our film go next.
Wednesday, 17 December 2014
Task Twelve - Transitions and Effects
Within the film making industry they are other techniques to make the film more interesting, this means that you can include transitions and effects. A transition is the movement from one shot to another, this can suggest different ideas to the audience which means that it is important to choose the right transition to match the scene. One of the most common transition used is called the straight cut, this is when one shot moves instantaneously without gaining any attention from the audience. They are been used to many times within film making which means that the viewers suspension of disbelief is not broken.
Within transitions they are other types, these can consist dissolves, fades, wipes and a graphic match.
A dissolve is when a shot fades into the next shot and the audience will be able to see both shots at a mid point. A dissolve means that the shots are connected in some way or even to show that time has passed. This is transition is used because it normally looks good in films but it is normally avoided within the film industry.
A fade is similar to a dissolve but it is a gradual darkening or lightening of an image or clip until the screen becomes black or white, they normally indicate the start or end of a particular section of time within the narrative.
Wipes are an unusual type of transition, this is when the transition pushes one clips to the other and as well as a dissolve it can be used to gain a sense of time has been moving on as well as something has happened in two different places.
Then we have a graphic match, this is when you deliberately choose two similar shots in the same shape by adding a dissolve. This is used so that you can show that two shots have been linked together, this is a special type of transition. An example of this would be Physco when the character gets murdered in the shower. This is one of the important ones because is is really smart on how they have used it, they used it to show represent her death has literally just gone down the drain.
On the other-hand we have effects, this is where you can simply add a colour or filter in order to give a sense of different time zones and how they are linked with the clip. An example of this would be the film The Wizard of Oz, when the hurricane hit Kansas and Dorothy woke up the colour change in order to represent a change in time.
Another effect would be using time and speed, this is where things have been sped to represent a huge change in time such as 100 years. An example of this would be the film Time Machine, this film used techniques which would include having to film two of the same shots twice in order to make it work, then you would have to record all of the day in order to represent the moving of the sun. But a modern day version of this technique would be Harry Potter and the Prisoner of Azkaban.
So why would these techniques need to be used? We would want to use techniques like this so that we can give an affect to the audience, such as a fade representing that time has either gone back or has passed.
Within transitions they are other types, these can consist dissolves, fades, wipes and a graphic match.
A dissolve is when a shot fades into the next shot and the audience will be able to see both shots at a mid point. A dissolve means that the shots are connected in some way or even to show that time has passed. This is transition is used because it normally looks good in films but it is normally avoided within the film industry.
A fade is similar to a dissolve but it is a gradual darkening or lightening of an image or clip until the screen becomes black or white, they normally indicate the start or end of a particular section of time within the narrative.
Wipes are an unusual type of transition, this is when the transition pushes one clips to the other and as well as a dissolve it can be used to gain a sense of time has been moving on as well as something has happened in two different places.
On the other-hand we have effects, this is where you can simply add a colour or filter in order to give a sense of different time zones and how they are linked with the clip. An example of this would be the film The Wizard of Oz, when the hurricane hit Kansas and Dorothy woke up the colour change in order to represent a change in time.
Another effect would be using time and speed, this is where things have been sped to represent a huge change in time such as 100 years. An example of this would be the film Time Machine, this film used techniques which would include having to film two of the same shots twice in order to make it work, then you would have to record all of the day in order to represent the moving of the sun. But a modern day version of this technique would be Harry Potter and the Prisoner of Azkaban.
So why would these techniques need to be used? We would want to use techniques like this so that we can give an affect to the audience, such as a fade representing that time has either gone back or has passed.
Task Eleven - Creating Pace with Cross Cutting
Task Ten - Understanding Pace
In order for a film to be successful it would need to include pace, within pace there are a few points that should be included and they are engaging the view, the speed of editing, cross cutting, cutaways, creating pace and the development of drama.
To begin with what is engaging the viewer? This means that the viewer who it watching a film tends to be really focused on the film and does not look away, this then gets them thinking on what could happen next. This is a powerful technique within pace because it makes the viewers enjoy the film more and is intrigued ti know what is going to happen next.
Secondly is the speed of editing, this is the time difference between each scene where it could be a few seconds or even a few minutes between each scene. But the length of each sequence represent the pace of the film moving the action along, an example of this would be if there was love shown in one scene, the time between each scene would be longer compared to others.Then there is another technique within pace editing, this type of technique is known as creating pace. This is when you are filming a scene but when you come to the editing process, you can add in the clips in and change the way how long the clip is or how short. When using this technique it allows you to experience a sign of action or love. An example of this would be used in the fighting scene of The Bourne Ultimatum. But when the pace is slow it normally represents love, this is shown in the film The Notebook.
Thirdly is cross cutting, this is when you created a sequence but you re-order it in able to develop a sense of drama for the audience. This makes the film more interesting and more exciting for the audience so that they don't find it boring. An example of cross-cutting is when Casey died in the film Scream which was shown at the opening. This could also be seen as the development of drama. Drama was developed in this scene by Casey getting extremely worried about her getting killed, once she starts getting chased the cross cutting starts to become involved where we see her parents coming closer and closer to make its audience think will she make it? Just before she gets killed we know that she died and unfortunately did not make it in time.
Next up will be cutaways, this is when a film has been interrupted when being created on purpose shortly followed back to another scene. The reason why they have done this is to avoid using a jump cut so that they make sure does not confuse the audience in order to make it a basic film to understand.
Task Nine - Non-Continuity
Non-Continuity Editing
Non continuity editing is another style of editing yet it means that your videos will not be how they are meant to be, this style of editing has been around since the 1950s and the 1960s which made it very popular. Film makers such as Jean Luc Godard and Francois Truffaut pushed the limits of editing techniques and created something called the French New Wave. This is where films were used to create a carefree editing style in which it did not conform the normal way of editing, also known as Hollywood editing. This then meant that it drew a lot of attention and made the audience think a lot more than they normally do to a film, as well as seeing it in a different way. This is known as self-reflexive nature. In this time non-continuity editing became very active.
This meant that a few people took this on board, a French director known as Jean Luc Godard created a film called A Bout De Souffle where a specific scene involved a jump cut, this was when the mirror changed, a change in the background and the change of the lighting. This was used because Godard wanted to startle the audience in order to gain attention to a specific part. You would then have to think why was this used? Well this editing technique was used because when editing first came around everyone was using the same editing technique, so in order to spice things up a little bit Godard added a jump cut in order to get the audience thinking about the film.
Next was a film called The Shining who was created by Stanley Kubrick who broke the 180 degree. This was when a character's position has been switched around because of the camera angle being changed. But not only do the old films include this, modern day films still do this type of stuff. An example of this would be The Hunger Games, this was used to show how Katniss feels about her new environment. He decided to break the rule and use this technique in order to show the audience how she felt about her new living environment. As you can see in the two pictures below, it shows a camera and the character at one angle, it then shows the camera angle at the opposite side with the character on the right hand side rather than the left.
Task Eight - Using Continuity Editing Techniques
For each technique we was able to use it successfully, the video started of by using a eye line match to then a point of view. It shows the character doing his work and then turning around to look at the clock behind him, once he had turned around it then changed to a POV (Point Of View).
In the next part of the video was another character walking in the corridor and then walking into a classroom, this specific scene the technique shown was match on action.
Then we had the the conversation between the two characters which shown the technique of shot, reverse shot seeing as it was a conversation, at the same we made sure that we obeyed the 180 degree rule which shows that the characters are in the same position they should be in.
Task Seven - Understanding Continuity Editing
Understanding Continuity Editing
To begin with what it continuity editing? Well continuity editing is what has became known as the modern day and the most popular classical Hollywood style editing. The history of continuity started of by being developed by the early European and American directors, an example of this is shown in DW Griffith film named The Birth Of a Nation. In order to make this type of editing successful you would need to think about the specific techniques that can be used as well as thinking why is it important, well continuity editing is important because it helps maintain realistic time and helps give a feeling that time is moving forward.
Next up are the techniques that can be used in continuity editing, these techniques include match on-action, eye-line match, shot reverse shot and the 180 degree rule.
First up is the match on-action technique, this is where you can link two shots together when the character is doing an action. An example of this would be where the character is walking to a door and then the other shot is him/her walking in the door. This means that this technique would have to be filmed twice.

Next is eye-line, this is where you can also link two shots together in order to see the character doing something, but then the clip has been changed to a point of view to show the viewers what the character is looking at. This allows them to gain an insight of what it is like to be the character. They would use this technique in order to make between each shot look better than it already did.

Thirdly we have shot reverse shot which consists of two shots, the first shot will reveal one character and then the other will reveal the other character, this type of shot is normally used in a conversation. They would use this in a conversation to show a conversation is flowing smoothly as well as to show who is speaking to let the audience know.
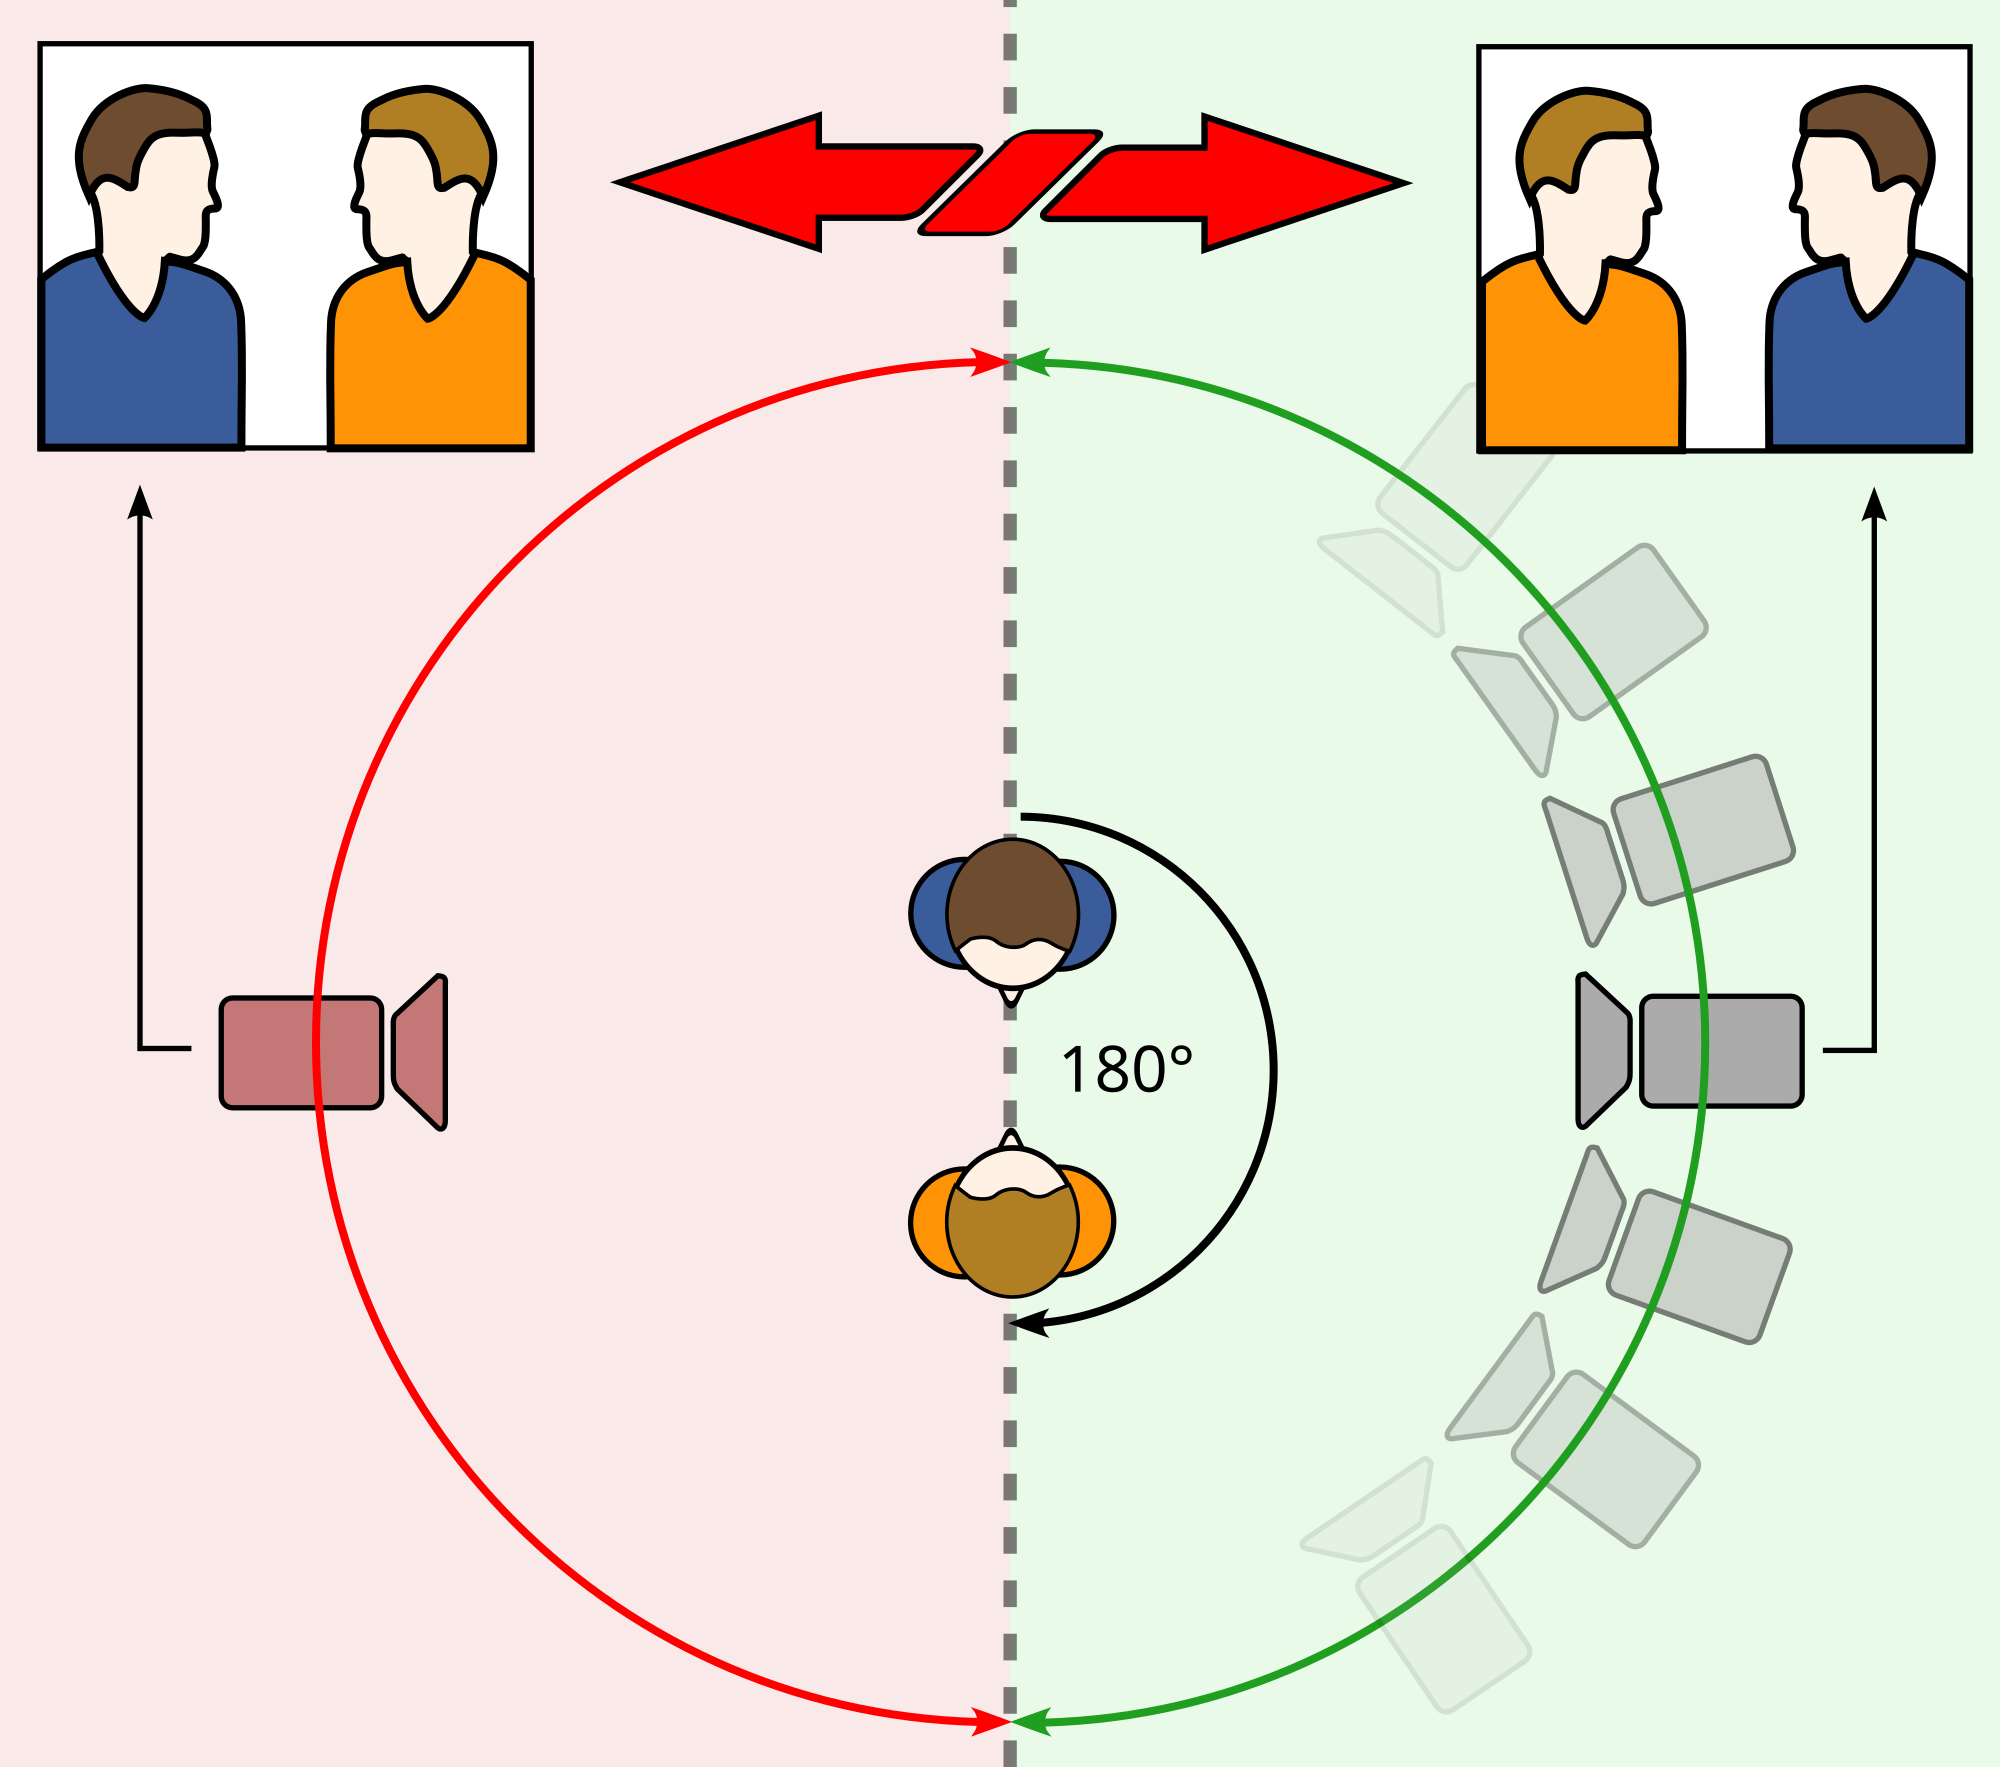
Finally we have the 180 degree rule, this type of rule is a basic guide line in order to make films successful. This rule allows two or more character to stick to the position that they are in for when the recording begins, if the camera was to pass this line it is called crossing the line. In some films the directors would make the actors break the 180 degree in order to express how someone may feel or there might be a reason to why they have done this.
Next up are the techniques that can be used in continuity editing, these techniques include match on-action, eye-line match, shot reverse shot and the 180 degree rule.
First up is the match on-action technique, this is where you can link two shots together when the character is doing an action. An example of this would be where the character is walking to a door and then the other shot is him/her walking in the door. This means that this technique would have to be filmed twice.
Next is eye-line, this is where you can also link two shots together in order to see the character doing something, but then the clip has been changed to a point of view to show the viewers what the character is looking at. This allows them to gain an insight of what it is like to be the character. They would use this technique in order to make between each shot look better than it already did.
Thirdly we have shot reverse shot which consists of two shots, the first shot will reveal one character and then the other will reveal the other character, this type of shot is normally used in a conversation. They would use this in a conversation to show a conversation is flowing smoothly as well as to show who is speaking to let the audience know.
Finally we have the 180 degree rule, this type of rule is a basic guide line in order to make films successful. This rule allows two or more character to stick to the position that they are in for when the recording begins, if the camera was to pass this line it is called crossing the line. In some films the directors would make the actors break the 180 degree in order to express how someone may feel or there might be a reason to why they have done this.
Wednesday, 15 October 2014
Task Six - Our Montages
Hollywood Montage
Here we have created a Hollywood montage, in this Hollywood montage we were able to record a whole school day but cut it down into a 2 minute and 20 second video. The whole point of this video is to show that we can record a school day, edit it successfully and upload it onto youtube.
This creates a meaning of us showing that we are able to use the correct ways of recording and editing styles within this piece of work.
Overall I think that this was a successful video in parts of the film and some other parts would have to be improved.
Soviet Montage
Here we have our soviet montage to represent a school day, a soviet montage is where you use a clip and then after the clip you would use an image or another clip to represent the previous clip. The whole point of this montage is to show the audience that we can successfully create a good soviet montage, this montage shows the audience how we feel towards a school day by using one clip and then after it using another clip to represent the first clip. Overall I think that this was a successful piece of work.
Friday, 10 October 2014
Task Five - Understanding Montage Theory
The term montage has a few meanings, the three meanings of montages are French Montage, Hollywood Style Montage and the Early Soviet Montage.
The French Montage
In French, montage means to edit. This means that there are no examples of a French montage because of its meaning. An example of the French montage would be modern day films. This editing technique is used because without it you would not be able to edit a series of clips and put them together as a film.
Hollywood Montage
A Hollywood montage would be used to show the best parts of a long period of time into a space of a short time, an example would be Rocky. This is where we see him training over weeks and months of hard training put into a 4 minute clip. This type of editing technique is used to allow the viewers to gain an insight of the best parts of a scene and keeps their full attention to the film, whereas if you did not use this editing technique and you was to show long scenes thag are boring, you would end up with an audience that is bored and frustrated.
Early Soviet Montage
An Early Soviet montage is when you create a film but you contrast two clips or images, film makers started to juxtapose shots to create a new meaning. An example of this would be strike. This powerful editing technique is used to get the viewers thinking about the two clips or images and what is happening. An example of this would be the Kuleshev effect
During this era you had two key people who were Les Kuleshev and Serge Eisenstein.
Les Kuleshev was one of the first people to be in the early cinema era. He is well known for creating a short film that uses the same clip with a Russian actor and after the clip and then after this clip he would show an image of some sort so that the audience will think differently of the shot, this was called shot by shot and most commonly known as the Kuleshov effect.

Next up is Serge Eisenstein, he was know as the creator of editing. Eisenstein was the one who created Soviet Montage which was where you would compare and contrast a clip with another clip, in order to show this he created a Soviet Montage called Strike.
The French Montage
In French, montage means to edit. This means that there are no examples of a French montage because of its meaning. An example of the French montage would be modern day films. This editing technique is used because without it you would not be able to edit a series of clips and put them together as a film.
Hollywood Montage
A Hollywood montage would be used to show the best parts of a long period of time into a space of a short time, an example would be Rocky. This is where we see him training over weeks and months of hard training put into a 4 minute clip. This type of editing technique is used to allow the viewers to gain an insight of the best parts of a scene and keeps their full attention to the film, whereas if you did not use this editing technique and you was to show long scenes thag are boring, you would end up with an audience that is bored and frustrated.
Early Soviet Montage
An Early Soviet montage is when you create a film but you contrast two clips or images, film makers started to juxtapose shots to create a new meaning. An example of this would be strike. This powerful editing technique is used to get the viewers thinking about the two clips or images and what is happening. An example of this would be the Kuleshev effect
During this era you had two key people who were Les Kuleshev and Serge Eisenstein.
Les Kuleshev was one of the first people to be in the early cinema era. He is well known for creating a short film that uses the same clip with a Russian actor and after the clip and then after this clip he would show an image of some sort so that the audience will think differently of the shot, this was called shot by shot and most commonly known as the Kuleshov effect.
Next up is Serge Eisenstein, he was know as the creator of editing. Eisenstein was the one who created Soviet Montage which was where you would compare and contrast a clip with another clip, in order to show this he created a Soviet Montage called Strike.
Saturday, 27 September 2014
Task Four - Analogue To Digital Editing.
Analogue Editing

Analogue editing is the process of cutting up celluloid film and putting them together again, this is also knows as splicing. Films are made up of images that printed onto the film to create a acetate negative, the process of splicing then comes involved so that the film can have different camera angles. In order for a film to be successful, 24 frames a second needs to pass through the projector in order for it to be successful. Analogue is referred to old fashioned.
Video Editing
 Before digital technology came along, video editing came along. This was when magnetic tapes were used to store information, these were also known as video tapes. The process of video editing consisted of editing the segments using a device that mechanically puts them together. In other words it would cut up the film and then mechanically glue them together rather than cutting and glueing it manually. This had to be edited in a specific order so that the film would go in order, this is known as linear editing. The process of editing in order. This would be successful by a person sitting in-front of many monitors to direct which camera to go to next whilst everything is being recorded.
Digital Editing
Finally you have the pros and cons of traditional methods of analogue editing and the pros and cons of digital editing.
To begin with, the pros of analogue editing is that when you are working with a film and you are splicing the film you are taking care n what you are doing which means that the final result will be a better outcome. Whereas on the other hand you have the cons, these cons can consist of it being manual work and tiring. Also if you make a mistake whilst splicing the movie if you are unable to go back and make a change to the mistake.
Secondly you have the pros for digital editing which can consist of it being cheaper and you are able to add a lot of manipulations such as effects or background music, on the other hand you have the cons of digital editing. These cons can include it being to hard for some users, because there are so much features within a editing software there is a lot to learn. You can also have problems such as technical difficulties, so in other words the programme can fail or your computer can have internal problems.
Friday, 26 September 2014
Task Three - Developing Editing Techniques
Developing Editing Techniques
In-camera editing is a type of editing where you record and stop recording which allows you to jump from scene to scene with different camera angles.
With in-camera editing there are going to be pros and cons. To begin with will be the pros, when we were creating our short film we noticed how time efficient it is and how much easier it will be to edit. Also we put much more thought into creating our short film. But where ever there are pros there will be cons, as you can tell from jumping from scene you can notice that we froze in our positions then the camera would stop recording. This is because the lack of communication and our timings were not correctly used.
In our in-camera editing shoots, we used shot types such as mid shots, close ups, long shot and a wide angle shot. We had success in our acting skills which were much better than the last time we done some acting, also we had one successful scene from when it went to one point to the other. Things to improve would be our communication skills, timings and camera skills. This is because some scenes were not successful and this was due to the lack of communication skills and our timings. Personally I would say that we have improved on our acting skills mainly but many things to improve on.

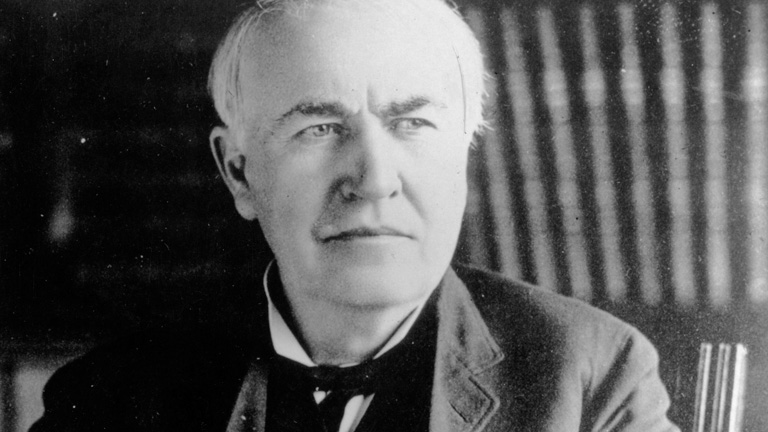
Here is an example of a person who created in-camera editing.
Saturday, 20 September 2014
Task Two - In Camera Editing
Here is where we all started off by doing in camera editing, this is where we used the start and stop button in order to edit whilst recording. As you can see there were some parts that were successful and there were some parts that were unsuccessful, this is because it was hard to communicate and act.
Wednesday, 17 September 2014
Task One - Editing in Early Cinema
Development In Editing
In this blog I will be explaining how the development in editing has changed over the years.
Then another person came along called by the name of G.A Smith, he took upon The Lumiere Brothers of creating the film called The Miller and The Sweep. This is where G.A Smith had no story involved and also no editing involved, each film ran as long as it could as long as there was enough film in the camera. The film was based about a Miller was was coming from his windmill and started walking towards he camera but accidentally bumped into a stranger and then it caused into a fight. This was the first sign of comedy in the film industry. Then in 1899 Smith created another film called The Kiss in the tunnel which was told to be the beginning of the narrative editing.
this is when a story is being created. Smith stated "felt that some extra spice was called for" in the film Phantom ride which was popular back then. When he created this, he used the advantage of the darkness when the train was going through the tunnel and spliced it into another scene.
Then came along George Melies who was a magician and thought he could use his skill to join the film industry. Melies skill was being a magician and doing all kinds of magic tricks, but the reason why he is important because he accidentally invented in camera editing by his camera breaking down. So then in 1896 he took upon his invention and created The Vanishing Lady using in camera editing. This was done by his camera accidentally breaking down which paused the recording, and then working again causing in camera editing. This was more than motion! But he was unable to different shots and he was soon overlooked, this meant he did not become successful and died in poverty. So a film was dedicated to him in the recent film called Hugo.
Another person who became known into the film industry was Edwin S. Porter who joint the film industry lab of Edison in the late 1890s. The reason why he is known is because he created a successful film called life of an American fireman in 1903. This is famous is because he was the first person to have a set plot and scenes. They also included close up shots of the fireman pulling the alarm, it made this so important because Porter he discovered the important aspects of motion picture language. Then he filmed Great Train Robbery in 1903 which was also a success. This film was a perfect example of how early films began t resemble the types of films we see today.
Then in 1907, Charles Parthe created a film called The Horse that Bolted. This film consisted of a man and a horse which had two different shots, the horse was eating food and the man going upstairs to see someone. Then the horse gets in trouble for eating the food and bolts off, causing major mayhem trying to escape. He became known in the film industry because he invented parallel editing, this is when you cut between two story lines. As an example would be going between the horse and the delivery man. He was also the first person to create a feature length which is a film about 90 minutes long.
Finally D.W Griffiths, he was a U.S film director and was a early supporter of the power of editing. He created cross-cutting editing to show parallel action in two different locations and he was also one of the first of the early directors to use all of the editing skills in the production of 'feature length film'. This is when a film in longer than 90 minutes, just like nower day films.But Griffiths is mainly known for the film The Birth of a Nation which used all of the editing skills in 1915. This film is over three hours long based on a war/conflict that happened of this nation.
Subscribe to:
Comments (Atom)